I’ll try and put together a reasonably normal battle report to cover the game of my herd vs Alistair’s undead but i took no notes and very few pictures so it will be based mainly on memory and as such there is definitely some inaccurate reporting which I’ll apologise in advance for! (Not least I’ve missed out 1 each of our turns).
Scenario
Alistair rolled loot. One marker is placed in the dead centre of the battlefield and the each player puts one additional marker on the center line at least 12″ away from the others. The aim is to capture the loot counters. Straight off we made a mistake in the placement of the other two counters (or at least I did as it wasn’t on the centre line but in a wood on Alistair’s side of the table, proving once again how important it is to learn the objective rules).
Terrain and Deployment
We grabbed 6 pieces of terrain, 3 hills (at height 2), 2 woods and a tower (all height 4) and randomly placed them on the field. I won the roll for which side to take (using the normal cunning tactic of picking the side I was already standing), deployment is done unit by unit each taking turns to do so (and unlike warhammer, characters and warmachines are deployed individually).
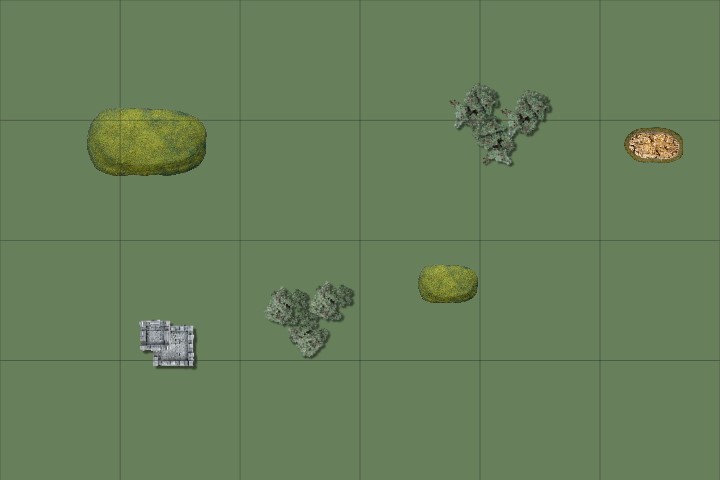
Alistair placed his 3 hordes in the centre, each supported by foot characters, where they could each challenge for a loot counter. His heavy cav and werewolves were on his right flank together with the mounted BSB and the Revenants on his left also with a mounted BSB. The wights were placed behind the spear Skeletons in a position to help his left flank or centre.
I played quite a reactionary deployment with both units of longhorns placed to counter the phalanx of spears. The spirit walkers placed centrally where they could threaten the archers or Warriors. The guardian brutes were placed as a second wave on my right flank as a deterrent for both his wraiths and the Revenant cavalry. The stampede and brutox covered my left flank. The Chieftain backed them up and the 2 shamans were placed to inspire the central and right flanks.

Turn 1 – Herd
I moved up aggressively in the centre and on the right flank, with the beast packs advancing to block the Revenant cav and archer hordes respectively. The left flank advanced far more cautiously ensuring they remained out of the charge range of the Soulreaver cav and werewolves.


Turn 1 – Undead
The undead responded with the phalanx of spears moving to claim the loot counter in the woods. The horde of Warriors advanced to capture the second loot counter. This left just the central counter free but under the watchful eyes of the archers who had advanced slightly. They then proceeded to annilate the beast pack in their way. The Revenant cav were content to sit and wait out the other beast pack and on the other flank the Soulreaver cav advanced slightly (keeping out of charge ranges) whilst the werewolves recklessly moved into an advanced position on the hill.


Turn 2 – Herd
Unable to contain itself, the herd charged in. The Brutox and Stampede attacked the werewolves, routing the unit. The Brutox over ran to move out of the charge arc of the cav and the Stampede reformed. The harpies moved to block the Soulreaver cav whilst the Chieftain moved up to support them. The spirit walkers stormed into the Warriors determined to claim the counter and although they caused a reasonably amount of damage the attack was repulsed. Both units of longhorns charged the phalanx causing a number of wounds but again the attack was beaten back.

Turn 2 – Undead
After the opening salvo against them, the undead lurched into action. The phalanx attacked the left unit of longhorns and the wights flew over and surged into their flank. The combined attack destroyed the unit with the wraiths reforming to face the brutes. The Revenant cav charged the beast pack making short work of it and over running.
On the other flank the Soulreaver cav took advantage of the poor positioning of the Brutox (with me forgetting you could pivot and charge in kow) and with 40 attacks into its flank, the outcome was only ever going to go one way (goodbye Brutox!). The mounted undead standard also got in on the action and charged the harpies to block any flank ideas they may of had, even wounding them but failing to rout them.
The grind in the centre continued with the spirit walkers on the receiving end this time. The archers continued to advance and poured their fire into the brutes but failed to do enough damage to rout them.

Turn 3 – Herd
The harpies screeching, flew at the BSB but failed to make an impact. Not so the Chieftain and Stampede who combined to destroy the Soulreaver cavalry. The Chief turned to help the harpies finish clearing that flank whilst the Stampede turned towards the centre.
The spirit walkers continued their tussle with Warriors and although the stalemate continued, the heals thrown on them by the Shaman were improving their odds and the collapse of the undead flank meant they were in danger of being overwhelmed in the upcoming turns.
The remaining unit of longhorns counter charged the spears. They continued to chip away at the unit with the Shaman supporting their efforts, knowing they were safe for one more turn from a flank charge.


Turn 3 – Undead
The Warriors continued to attack the spirit walkers but due to the continuous heals the herd unit had been receiving, it was a war of attrition they could not win. Recognising the danger from their collapsed flank one of the necromancers moved up to sacrifice himself.
In the centre the archers again fired at the brutes and then surged into combat where they were quickly rebuffed but only after wavering the brutes.
The Revenant cavalry having moved out of sight of the longhorns in error the previous turn had to be content with charging and running down the Shaman that had been a constant thorn in their side.
The mounted BSB again charged the harpies but failed to wound them.


Turn 4 – Herd
In a decisive turn for the herd, the harpies and Chief combined to bring down the mounted bsb leaving that flank well and truly in the hands of the Herd.
The Spirit walkers finally destroyed the Skeleton Warriors, in the process capturing the loot counter and the Stampede moved up to be able to charge in the next turn.
The Brutes shrugged off the effect of the wavering (fury) and charged the archers, quickly turning them to kinderling and reforming to face the enemy cavalry
The Longhorns also finally bought low their foe, capturing the second loot token that had been placed in the forest and also turning to face the cavalry.

Turn 4 – Undead
The Revenant Cavalry backed up by the remaining mounted BSB, chose to target the wounded longhorns and in a display of power wiped them out recapturing the loot counter that the Herd had only just gained.
With very few scoring units left, the undead embarked on a delaying tactic with one Necromancer charging the guardian brutes. The foot BSB charged the Spirit Walkers and the final remaining Necromancer moving to block the Stampede.


Turn 5 – Herd
The Spirit Walkers attacked but failed to kill the BSB. Both the Stampede and the Brutes made short work of the blocking Necromancers and moved into positions to threaten the remaining cavalry unit.

Turn 5 – Undead
The cavalry turned ready to meet the incoming charges and the bsb again tried to contain the spirit walkers.

Turn 6 – Herd
The brutes and stampede both charged the Revenant Cavalry wiping them out and capturing the the loot counter again.
With only two individuals left on the board who were unable to score Alistair didn’t take his final turn.

Result
The battle ended up a win for me with 2 tokens to 0.
It is worth noting that this battle actually went on to turn 7 but due to lack of notes and photos, the above report was based on memory so I am missing two turns, hence the report only shows up to turn 6 not 7. I also cannot remember exactly what killed the Revenant Cavalry so a little poetic licence has been used (i think the Stampede hit them in the flank as I do remember rolling 60 dice with them at one point!)
Conclusion
I have to say that it was a really enjoyable and relaxed game of fantasy and I have to offer a huge thanks to Alistair for both making it so and taking me through my first game. His models were a mixture of GW and Mantic, looked great and I loved how he has converted a horde of elves to Skeletons. It was really effective.
Rolling for a 7th turn was a huge stroke of luck and was really needed, as at the end of turn 6 we each had one token each and Alistair, whilst at a huge disadvantage in terms of units remaining, had managed to regain one of the tokens and due to good blocking and positioning was on course to get the draw. I had such overwhelming numbers at the end of the game that when it went to the extra turn there was very little he could do.
What it did bring to light was how important the scenario objectives were. At no point had anyone picked up the central loot counter and I had ignored it at one point to concentrate on trying to destroy everything. Capturing it early on could have made a big difference.
The rules themselves were everything I thought they would be. Very streamlined and slick. There were almost no rule clarifications required (something that even after 2 years of 8th edition still occur almost every game). It was also quick. We finished with plenty of time remaining and hadn’t been hurrying in the slightest which actually made it a nicer experience.
In terms of the game, I think Alistair’s major mistake was moving his Werewolves up way too far allowing me to combo charge them early on and remove them in one turn. I would go as far to say that this was possibly the turning point of the game as it isolated his most powerful unit. He showed his resilience though, as even when he had few units left he was able to stall mine and would have pulled out a draw if not for the lucky 4+ roll. I’m not sure I would have been as effective in that situation.
In fact that 4+ roll pretty much summed up my rolling for quite a bit of the game. I was definitely rolling above average whereas I’d say that Alistair wasn’t. It was highlighted in one round where I don’t think he cast 1 spell successfully with any of his Necromancers. Likewise he was unlucky not to rout some of my units early on
The undead did look very good fun to play. Those hordes soaked up a bucket load of hits and the ability to surge them into combat was brutal especially when the wraiths flanked me.
Oh and I’ve ordered another 50 dice as I hate having to reroll them.
My list – Evaluation
Overall I was please with my list. I think I misunderstood the spirit walkers. I thought they were an offensive unit due to the number of attacks but I think realistically, without magic items, I should consider them as more of an anvil as although they have 35 attacks, they hit on 4’s and they only have TC 1 which did far less damage than I would have expected. The high nerve combined with healing from the shaman meant they weren’t going anywhere.
The Stampede was everything I thought it would be. It hit like a freight train and i’ll definitely take it again and with the same item. The +1 to hit made a massive difference.
Likewise the Guardian Brutes were excellent and I think I made a good choice giving them the ‘elite’ item. With them only hitting on 4’s as standard, re-rolling 1’s was huge.
I haven’t made up my mind on the Longhorn regiments. They hit on 3’s have CS (1) and TC (1) but the 12 attacks puts me off a bit. I’ll have to use them a few more times before I make my mind up.
I have a similar dilemma with the Brutix. He didn’t have a chance to make a good showing. One issue is the base size. In KOW his base is actually only 50mm squared but mine are on 50*100mm, this made it possible for the Soulreaver cav to flank him, whereas on the smaller base he would have been out of their line of sight. He is also quite expensive at 220pts. For 10 points more I could get another horde of Spirit walkers which I am really liking sound of. Going on the base size issue alone, I may have to drop him.
I was fully impressed with the chaff. The beast packs and harpies did exactly what they were meant to, blocking his key units and generally interfering with his plans. I am thinking that I need more! Another unit of harpies would give me more options, allowing me to threaten the back field, whilst still giving me enough units to gum up the opponents plans.
In terms of the characters, the Shamans were excellent. I admit I was lucky with my healing rolls (averaging 4 heals from 5 dice each time) but they really made a massive difference to the staying power of the units. Bane chant was also useful. Alistair’s Necromancers only had bane-chant (2) vs my Shamans (3) and it really made a difference in getting the spell off as he failed his roll on a number of occasions. I did cock up with regards to their inspiring presence as I forgot it was only 6″ vs the spells 12″ range and I was lucky not to fail a couple of early nerve tests whilst they were out of range. Overall they are excellent and I would take at least 2 every game if not a third too.
The Chieftain did ok but I didn’t use him to his maximum potential. He is very fast and as such is better off getting round the sides to hit flanks or rears. I think pathfinder on him is a waste and he’d be better off with either the ensorcelled armour or nothing at all. I still think another Shaman might be preferable but maybe mounted so he can keep up with any faster elements of the army. Another route to try would be replace the Brutox and Chief with a flying Avatar. He appears to have a similar role to each but also comes with heal (8). He is expensive though and has the same base issues as the Brutox (mainly as I’d be using one of the Ghorgon models I have!)

Sounds really good man! This blog is making me sway towards KoW over Sigmar.
Where do you get your top down, battle tracker graphic thing? I want one.
LikeLike
It’s a program called battle chronicler. Completely free to download and use I’ll ping you the link on email or put up a blog post on it and how to use it.
LikeLike