
As I mentioned in a previous post, I haven’t played KOW in a good few years so I thought it was about time that I gave it another go and as usual that meant in the club competition.
My opponent for my first game was Cormac and his undead. By a fortuitous stroke of luck, he was down at the club as his dad was playing a game and was able to bring along his army after my booked opponent had to cancel at short notice. This worked out nicely as it meant we would both get bonus points for fitting in our first game before the deadline. (Note this game occurred in May so any mistakes are down to lack of notes and the time lapse between then and writing it up).
Lists
The Herd
Khazbar – Shaman – Heal, Critter Call, Amulet of the fire-heart – 150pts
Wazzock – Shaman – Heal, Shroud of the Saint – 145pts
Spirit Walkers – horde – Brew of Strength – 260pts
Spirit Walkers – horde – Blessing of the Gods – 255pts
Guardian Brutes – horde – Potion of the Caterpillar – 250pts
Stampede – horde – Brew of Haste – 275pts
Beast Pack – troop – 70pts
Beast Pack – troop – 70pts
Harpies – troop – Staying Stone – 95pts
Brutox – 220pts
Brutox – 220pts
Tribal Longhorns – regiment – 145pts
Tribal Longhorns – regiment – 145pts
Total 2300pts
Cormac’s Undead
Liche King – Heal – 165pts
Necromancer – Heal, Grimoire of Darkness – 130pts
Undead BSB – 50pts
Barrow Wights – horde – 265pts
Soul Reaver Cavalry – regiment – Potion of the Caterpillar – 320pts
Werewolves – horde – Brew of Strength – 275pts
Zombies – Legion – undead rats, brew of sharpness – 245pts
Wraiths – troop – 140pts
Wraiths – troop – 140pts
Revenants – horde – Undead rats, pipes of terror – 225pts
Revenants – horde – Undead rats, mace of crushing – 215pts
Ghouls – troop – 65pts
Ghouls – troop – 65pts
Total – 2300pts
Pre-match rolls
Terrain
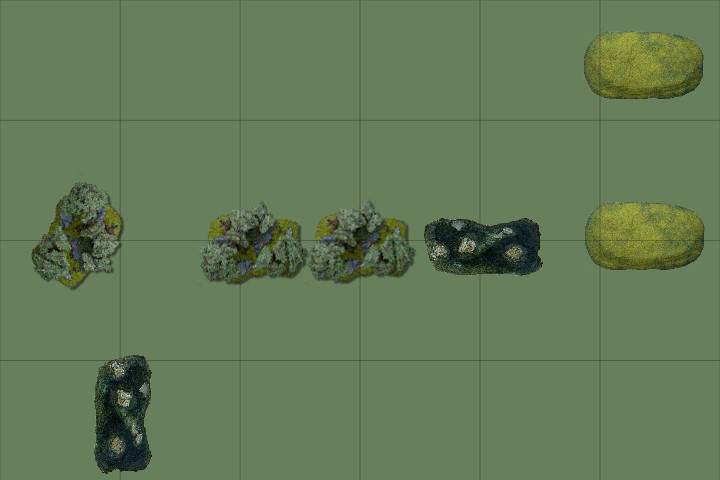
Neil (the TO) had once again produced a terrain pack. It’s not like the Epic Dwarf maps but instead you roll a D6 and based on that, you have a set number of different terrain pieces. In each scenario one piece of the terrain is placed in the dead centre. We rolled Map pack 3 which consisted of:
2*Marshes height 0 but grants a cover save modifier)
3*Woods (all height 4 and one of which had to be placed in the centre)
2*Hills (all height 2)
With my army pretty much all having the pathfinder ability (ignore combat penalties when charging through/into terrain), I made sure to place as much of it in a line down the centre of the board as it would work in my favour.
After placing the terrain in looked like this:
Scenario
The scenario played was to be ‘Control’: At the end of the game, divide the board into 6 2*2’ squares. The player with the most unit strength in each section controls it. All squares are worth 1 point except the centre square in your opponents half which is worth 2 points.
Nominated Unit
The competition also introduced a limited experience table. Before the battle, each player could secretly nominate 1 unit (some restrictions applied to what you could nominate). If that unit survived, it could roll on a table that would give it an extra ability. Anything from +2 attacks to re-rolling 1’s to hit (Elite) etc. Nothing on the table was outrageous, pretty much it was just existing skills in the game and was a nice touch.
For my unit, I chose the Guardian Brutes, mainly as they were the only thing with any armour!
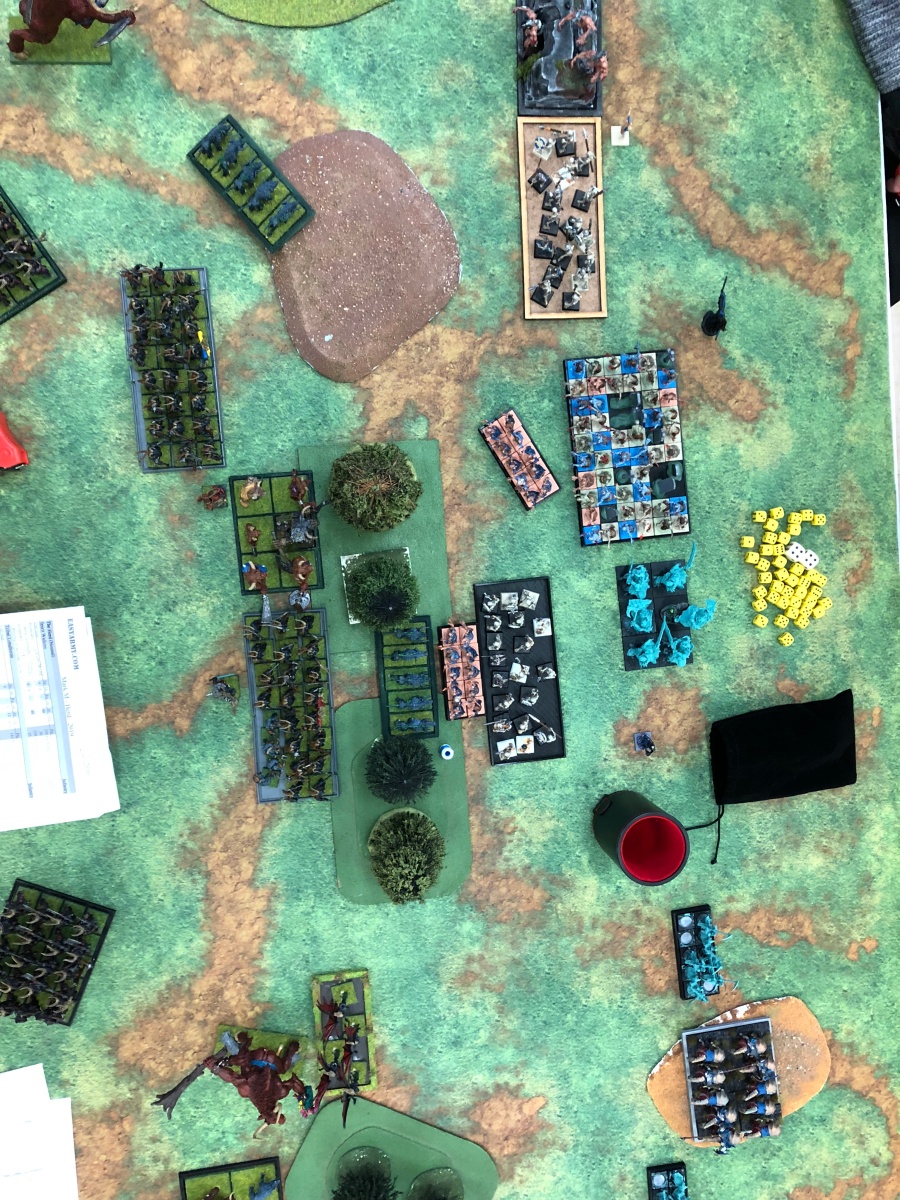
Deployment & Plan
With Cormac sporting 3 units of flyers and having been caught out by them before, I decided to deploy with a layered effect with the Longhorns set right behind my lines. Hopefully they could prevent the flyers leapfrogging my units and causing carnage from behind. With no shooting opposite me, the two shamans went front and centre to maximise their move before they needed to cast and the majority of the herd were placed around them in order to be covered by their healing and inspiration. The aim was to try and crush the centre, with my units being able to weather any attacks due to the concentrated healing. The Stampede and Brutox’s were set up on the flanks as a holding force.


Opening Gambits
Winning the first turn, I moved up all my forces at the double ensuring I kept just outside of Cormac’s charge range. Chaff units moved to provide interference. In the centre, I was careful to make sure that a number of the units were just on the lip of the woods so they would be able to charge through them and were protected as any foe charging them would be hindered. Khazbar cast his one-time spell, Critters call, on the horde of Barrow Wight’s in the centre. This was to make sure they wouldn’t be able to use their fly ability to leap frog my lines in the opening turn. In hindsight and based on their position, they likely wouldn’t have done so but I was seriously worried about them rampaging around.


Cormac’s forces responded by cautiously moving up. The one exception was his unit of ghoul chaff who looked to take out my own beast pack chaff (and failed), covering the swift advance of one of the hordes of Revenants.


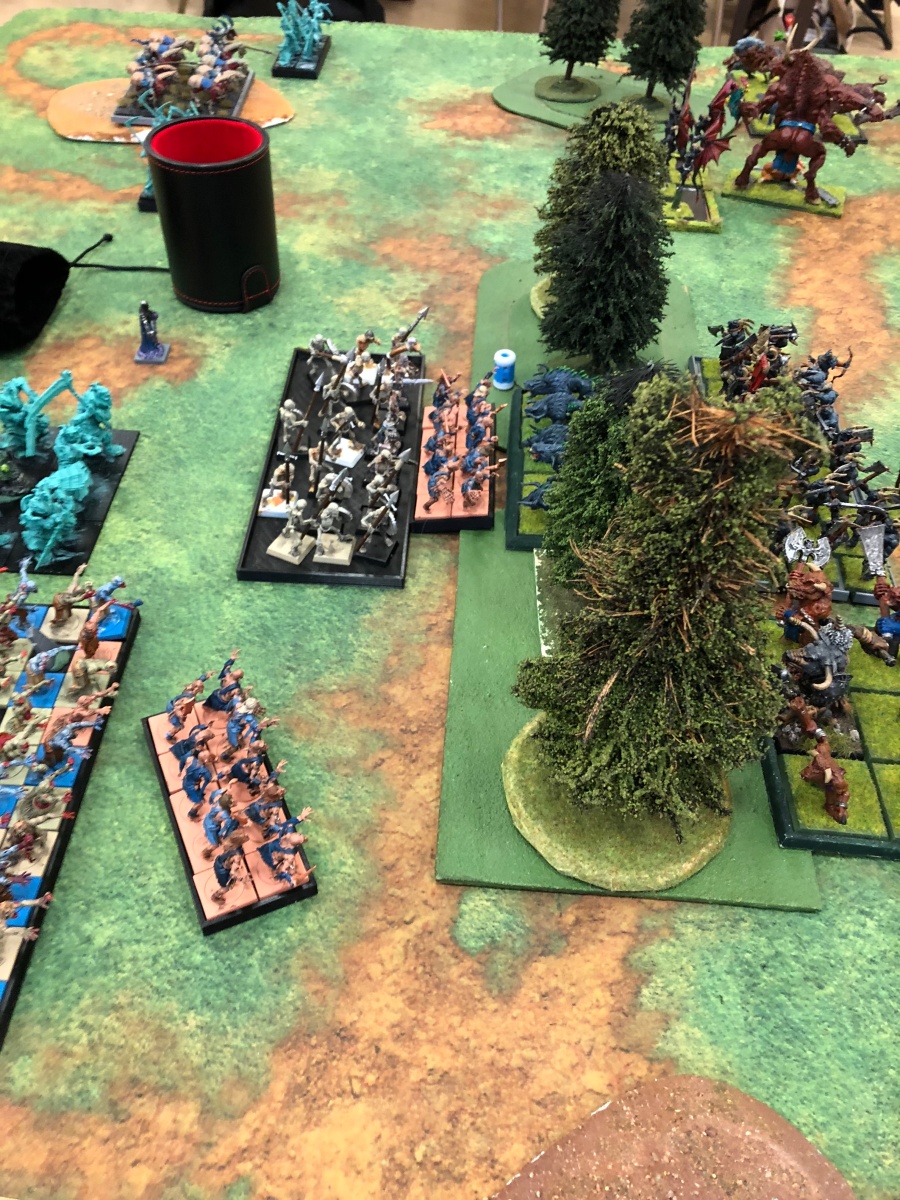

First Strike
Sensing an opportunity, Khazbar unleashed his forces. The Beastpack countered the ghouls but make as much as an impact as the ghouls had the previous turn (much to Cormac’s disgust). One horde of Spirit Walkers crushed the ghouls in front of them, which allowed the Guardians to slip into a small gap and get the opening attack on the Revenants who had been sheltering behind the ghouls engaged with the Beast pack. The other beast pack moved up to block both the Revanent horde and the werewolves on my left flank (covering the advance of the Brutox and Tribal Longhorns).
On my right, the harpies also performed a blocking move whilst the other forces moved up.


Having make the opening attack, the herd were soon to feel the counter blow. The left flank was the first to feel it with the two units of wraiths each targeting a unit. It was a smart move by Cormac, as although they had almost no chance of removing the units attacked, they did disorder them, meaning that my units lost their thunderous charge ability (which increases the chance of getting through the armour of their foes), something I had forgotten about it my hiatus from the game. His Cav also swiftly removed my Harpies, leaving them free to engage other targets on his next turn.
In the centre the battle of the useless chaff continued with the Ghouls yet again failing to remove the dog pack. This meant we both had hordes that were basically blocked from contributing. Cormac then charged into combat with as many of his other units as possible though with the congestion in the centre, it meant he was unable to get the Revenants to counter charge. Despite taking heavy wounds, the only unit to fall was the sacrificial beast pack on my left flank.


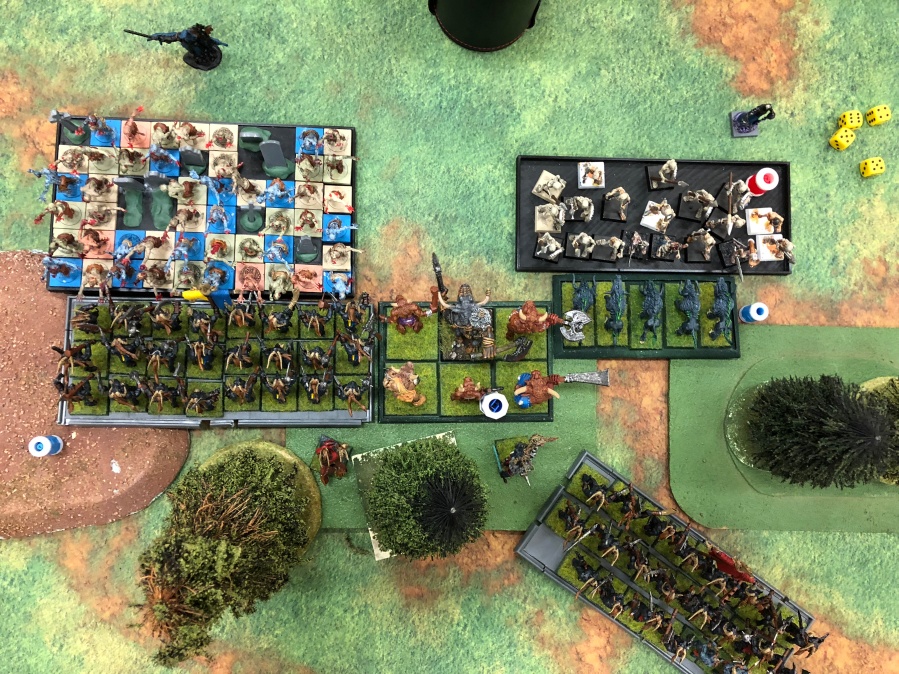
The Hammer blows
Having weathered the counter, the herd went on the all-out offense. Both units of wraiths were destroyed on the right flank, leaving just the Soul Reaver Cavalry, who were now outnumbered 3-1. The other flank had a similar story with the Brutox and Tribal Longhorns combining to destroy the Revenant horde. It did however leave themselves wide open for the waiting Werewolves to attack.
In the central melee, the Beast pack gained a moral victory and finally killed the ghouls, over-running to still get in the way of the final Revenant horde.
The Guardians and Spirit horde, recognising the threat of the Barrow Wights, combined and made short work of them. Khazbar and Wazzock did what they could to heal the injured units in front of them.


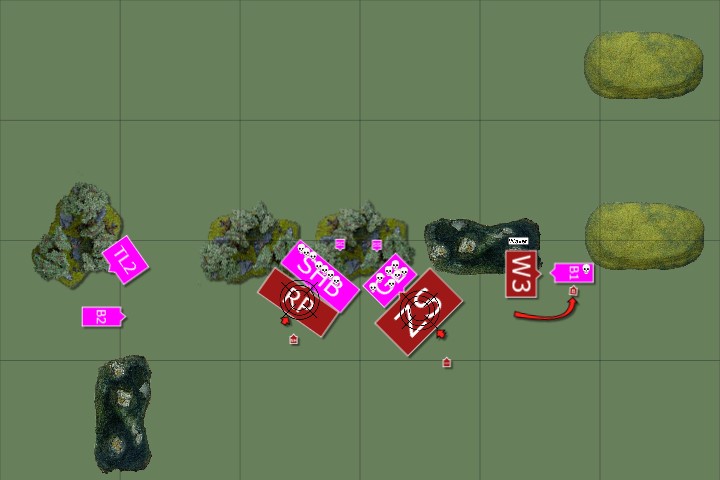
With the undead forces having taken a serious blow, Cormac launched a co-ordinated strike. The Soul Reaver Cav, charged and removed the Stampede, recognising it was the greatest threat to him on that flank.
The Revenant Horde had no choice but to attack the beast pack, to open up options for it in the next turn. The Zombie Legion attacked the weakened spirit horde and removed it.
The werewolves also showed their prowess in swiftly cutting down the Longhorns and moving to flank the Brutox.
All this combined to once again even up the playing field and give us both everything to play for.


The Holding Action
With things looking balanced, the Herd once again launched the attack. On every front. Despite causing massive casualties, the undead took everything that was dished out. Seeing the Guardians about to cop a bucket load of attacks from the legion of zombies, both shaman focused the healing on them, taking the horde up to full health.


The response was just as brutal, with beastmen being slain left and right. On the right flank, the remaining Longhorns somehow managing to hold on (though being wavered, meaning they wouldn’t be able to attack next go). This meant that the Cavalry were in trouble as the fresh Brutox was ready to smash into their flank.
On the far side, the Brutox was also wavered but due to his special rule he would still be able to counter the following go.

As predicted, the flank charge by the Brutox was enough to crush the cavalry, so the herd now had control of that part of the table. The struggle in the middle continued with the spirit walkers and guardians receiving heals to boost their survivability as both failed to remove their opponents again.
In the battle on the left flank, the other Brutox returned the favour and wavered the werewolves. This was a bit more of an issue for Cormac as they wouldn’t be able to do anything next turn and so that flank was now looking in serious trouble for him.

The stand-off in the centre continued with his units also being healed and unable to remove the herd forces. On the left flank, in a move smacking of desperation (and a certain genius), the BSB charged into the Brutox, and with his single attack, managed to wound it, thus disordering him and removing his ability to wound the werewolves on a 2+ in the next turn. Although it was an unlikely outcome, it was a great bit of play. Fortune favours the bold and all that!
The Hammer Blow
In what would turn out to be the final go, the herd forces all counter charged in. Despite being disordered, the Brutox was able to crush the werewolves. The Guardians finished off the Zombies and the flank charge of the other Brutox, combined with the Spirit Walkers, obliterated the Revenant horde. With just 3 characters remaining on the field, Cormac graciously conceded defeat.

Result
With no opposing units left in which to score, it was a win to me.
We also had to record unit strength killed, in case of any tiebreakers:
Me = 21 points of unit strength killed (Horde 5*3=15, Regiments 1*2=2, Troops 4*1=4)
Cormac = 11 points of unit strength killed (horde 2*3=6, Regiments 1*2=2, Troops 3*1=3)
Having survived the battle, the Guardian Brutes (my nominated unit) rolled the Elite skill. This meant they could re-roll’s one to hit in the next battle. Happy days.
Conclusion
It was a fun way to get back into KOW and getting a win is always a great start to the competition. I was worried at the start of the game as Cormac has a reputation as quite a good player and there were elements in his list that I wasn’t sure how to deal with. The thing that probably went into my favour was the terrain placement, combined with my armies’ ability to ignore the negative effects of it. That really helped blunt some of his initial attacks and that combined with the large amount of healing I could do ensured the units were able to stick around. Overall an enjoyable game, though I’ll admit to writing this up a good couple of months late as due to work and a few other things, I didn’t have the enthusiasm to write it up before. As such any errors are due to the lack of notes and the time elapsed since playing.
